STEAM BAKINGAt the same time, stone is not the only, albeit a prerequisite, for successful bread baking. For a round shape, golden crisp crust and beautifully opened cuts, it is very important to moisten the bread in the first 10-15 minutes of baking. And this is actually a problem. Everyone who has tried to bake bread at home at least once has seen recommendations in the recipe to bake bread with steam for the first 15 minutes. Some even tried to honestly follow the advice and organize steam: they put a bowl of water on the bottom of the oven, a frying pan with boiling water, sprayed the walls of the oven from a sprayer, threw pieces of ice on a baking sheet, etc. But there was no noticeable effect, there were no fantastically opened thorny cuts, golden thin crust, but instead the crust was pale and coarse, and the incisions were ugly parted or just chilled, dented stripes. It didn’t come to me yet (until the experienced comrades opened their eyes)) that the problem was not in the proofing, but in the moisture, all the time we got a terrible ugly crust, and the bread was invariably tore into trash. After all, every time I fiddled, boiled a kettle, put a frying pan on the bottom so that there was steam, but this, it turns out, was not enough.
What is the reason why? These problems are especially relevant, again, for fastidious gas ovens, new and old, expensive and cheap, and they both sin the same thing: they are often not tight enough to evenly keep temperature and moisture. Therefore, while the bottom of the bread is “roasted”, the top cannot receive enough heat to form a crust: steam and heat evaporate, preventing the formation of the necessary color and texture of the bread crust.
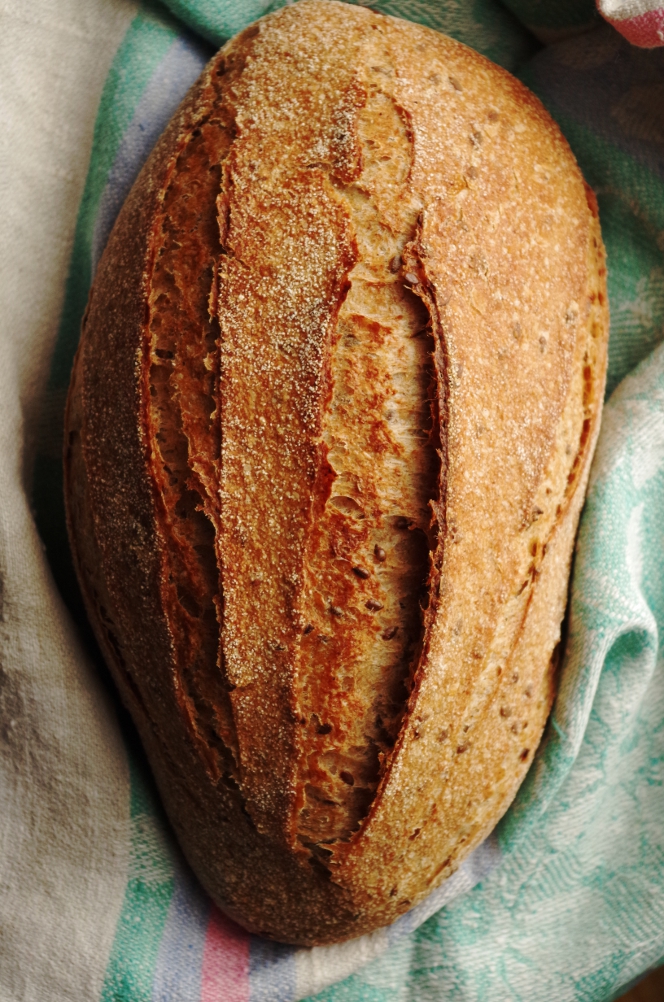
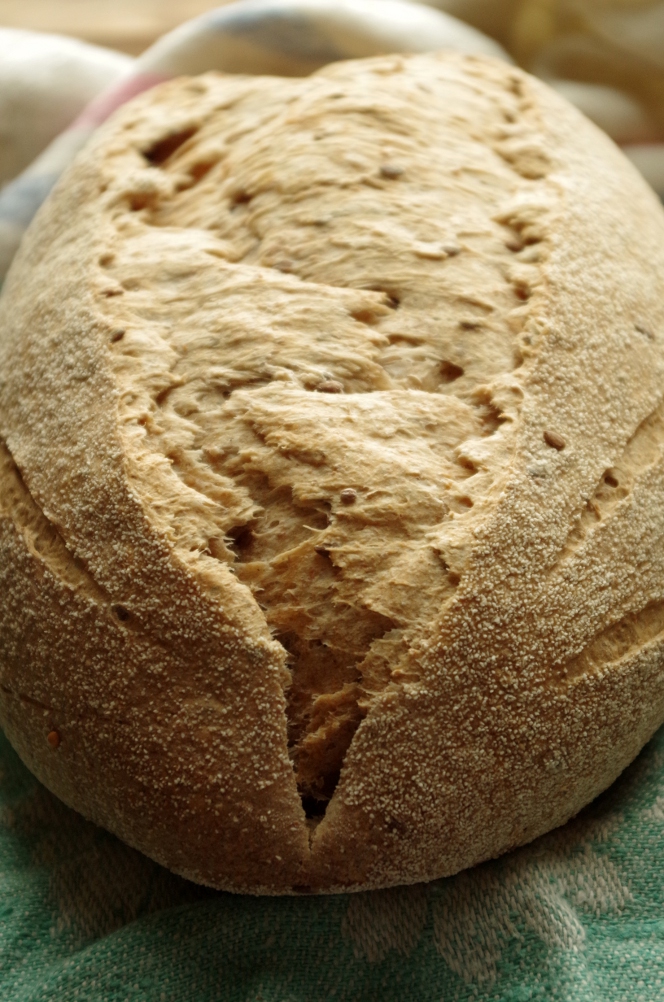
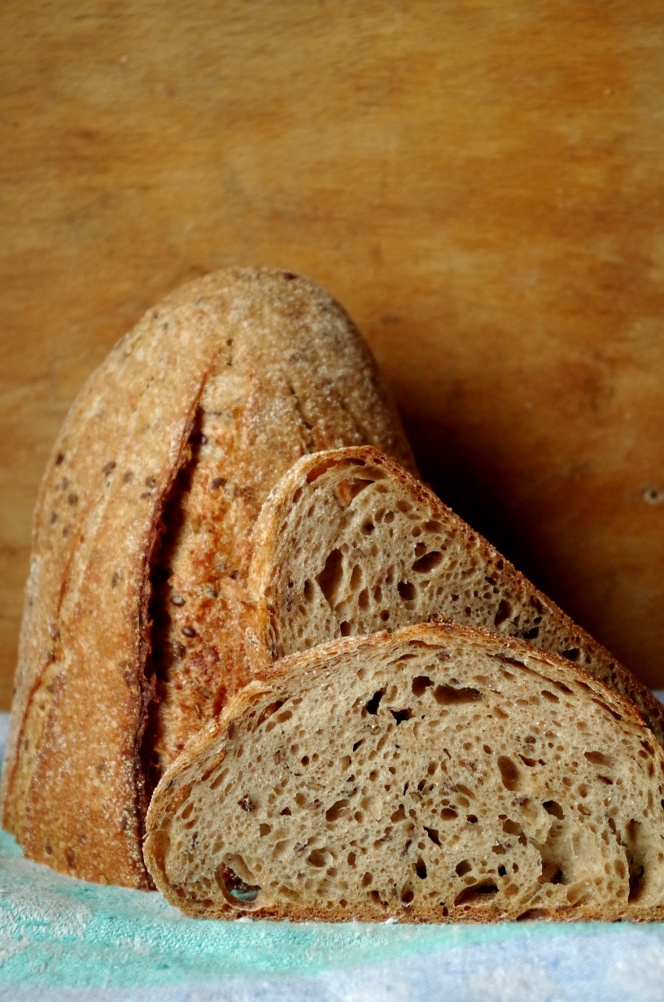
For comparison, two breads from the same dough, only one was baked with steam, and the second without, feel the difference. On the left with steam, on the right - without.
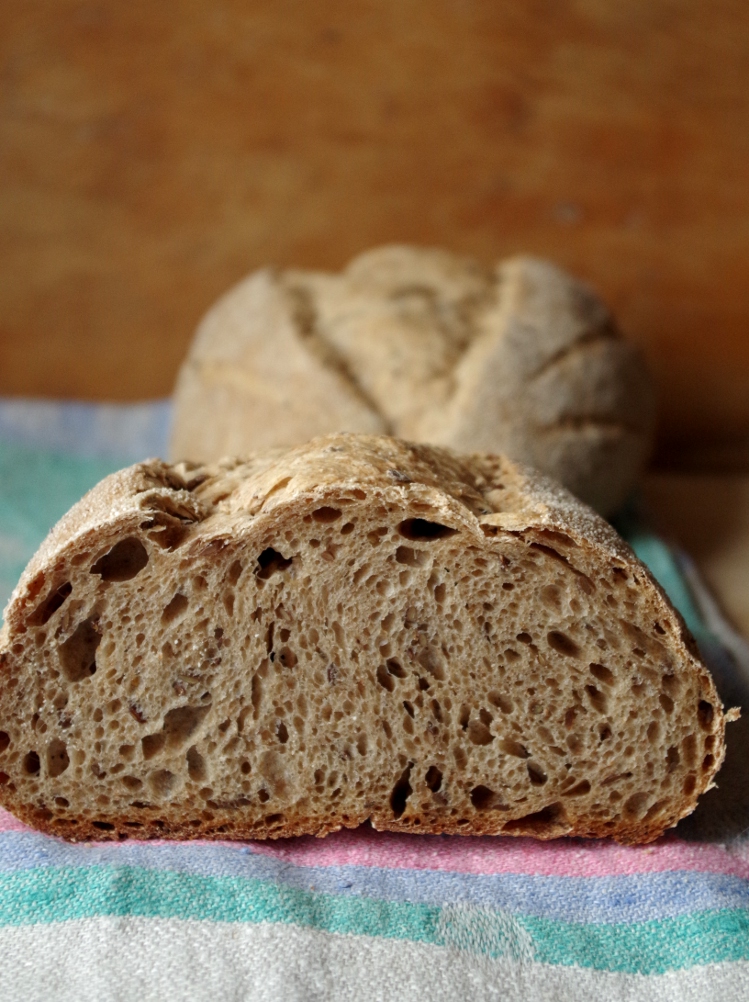
Here are these two breads in a cut. The first is with steam.
The second - without, but both on stone. The second one will even be more picturesque, but this is due to a less rigid molding, in general, their crumb is not much different from each other.
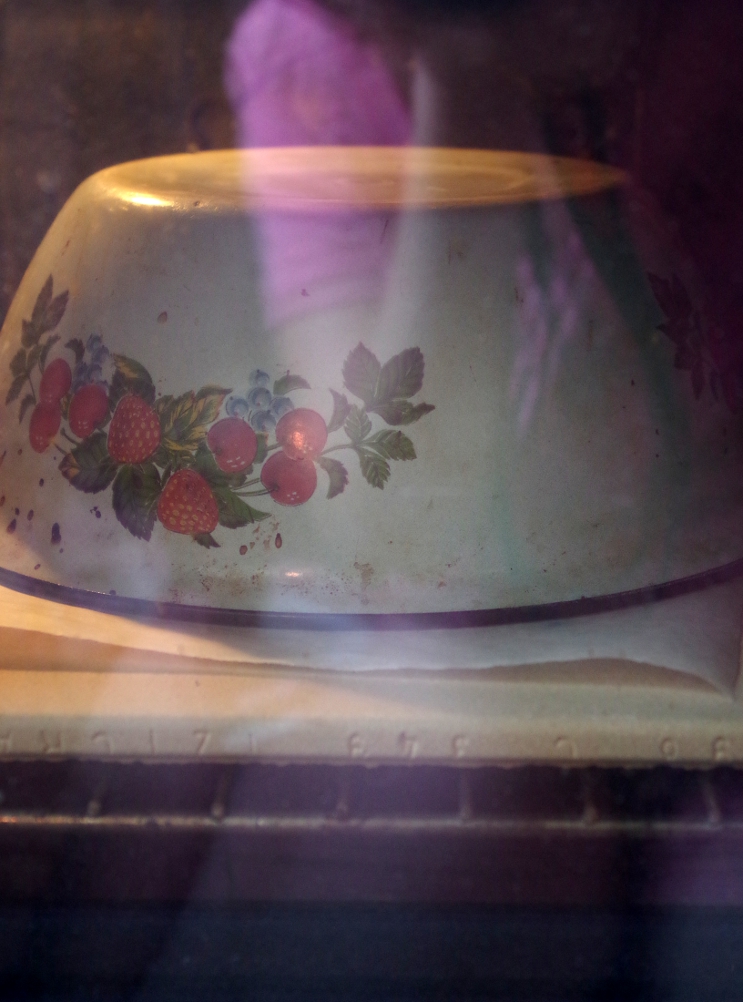
To organize steam during baking, sometimes a frying pan with boiling water at the bottom of the oven is really enough, but this is provided that you have a reliable oven that regularly blushes both the crust and sides. But if you are the lucky owner of a capricious gas oven (like mine), such steam humidification will not work - the steam will evaporate along with the heat. For me, the "cap" method turned out to be decisive - to lock the steam around the bread, covering the piece with a large enamel bowl for 15 minutes at the beginning of baking.
What happens to the dough during baking, why is moisture so important and how does it affect the formation of the “correct” crust and cuts? In short, the most important thing in this matter is temperature and moisture. During the first 10-15 minutes, during which it is advised to actively humidify the oven, a crust forms on the bread. At first, it is soft and inconspicuous, by the end of baking it becomes very dry and hard and can have a temperature of almost 200 degrees. Getting into a preheated oven, the bread begins to bake, the upper layers of the dough quickly heat up and, having reached a temperature of 100 degrees, begin to actively evaporate moisture, gradually completely drying out and becoming strong and dry. This, in fact, is the crust. And how it will look and sound depends on what conditions you create for it.
In more detail, here's what happens: on the surface of the bread (as well as inside, in general) there is a large amount of starch and proteins, in large quantities that make up flour.Mixing with moisture (evaporated by the bread itself under the hood or that that comes from a frying pan with boiling water at the bottom of the oven), they form a thin liquid film, which, when brewing (frying?), Becomes ruddy and at the same time smoothes the bread pores and other irregularities of the bread surface ... Thanks to this effect, the crust of bread, which was baked with moisture, turns out to be thin, ringing, crispy, shiny and golden, and the cuts on it open up with picturesque furrows. The color of the crust is also directly influenced by the temperature and baking time; the hotter and longer, the darker.
If the bread is overexposed under the hood, it will receive too much moisture, which will affect both the crust and crumb. The crust will turn out to be glossy and smooth, and the cuts will be smoothed and completely thornless. Maybe someone needs this, I like it more, so that they explode in such prickly waves, rise above the surface and become picturesquely ruddy. Since childhood, a passion for such things, which is now passed on to my children)
Which "cap" to choose and how to use itI usually use a large metal enamel bowl, it is thin and heats up quickly, I just cover the bread with it right after I put it in the oven. I set the time for 15-20 minutes, then, putting on mittens (mine are completely leaky, look what are here - gorgeous!), I pry on the bowl with a large knife, grab it with my hand in the mitten (you just can't use an oven mitt - you can scald it) and take the bowl out of the oven. The bread at this time is still pale, but by the way the incisions opened, one can already draw conclusions about the crust and the upcoming beauty)). During the baking process, they become even more prickly and prominent.
Sometimes I use a heavy cast-iron duck with a lid, but then I put it on the wire rack instead of a stone and heat it up with the oven for about an hour. Cast iron takes time to warm up, so long-term heating is required. The lid of the rooster should be removed 15-20 minutes after the start of baking, the oven temperature should be lowered to 200-180 degrees and baked until golden brown. By the way, I noticed that bread is baked much faster in cast iron and can even burn.
In general, any suitable heat-resistant cookware, even earthenware or glass, can be used for the “cap”. From ceramics, for example, there are good options. It is important to remember that some need to be heated in advance and for a long time (cast iron, ceramics), and some can be used cold, as a rule, these are basins and salad bowls made of thin metal and heat-resistant glass.
The “caps”, despite all their miraculousness, have two perceptible drawbacks. First of all, it is far from always convenient extra contact with hot objects and the risk of getting burned or scalded if handled carelessly. I have already burned my forearms a million times and scalded my fingers when I used oven mitts or towels, if I didn’t find mittens in time, and the bowl had to be removed urgently. Recently, an inconvenience has been added due to leaky mittens. The most embarrassing thing is that you need to at least sew it up if there is no way to get out and look for new ones, but I still can't find time. And from the available mittens we sell creepy synthetics, which simply melt when in contact with hot "caps" and ducklings.
And another big drawback (but you can live) - purely aesthetic. You cannot bake normal loaves or baguettes with them. Usually, all these bowls, bowls and bowls are round, so the shape of the loaves can be round or slightly elongated. For the same reason, it is not convenient to bake small items.
Baking, crumbBut back to baking. What happens inside the bread during baking, how does the crumb form? By the end of baking, the crust is almost completely dehydrated and can heat up to almost 200 degrees, while it prevents the moisture from completely evaporating from the bread, due to which a crumb forms inside the bread. Bread is considered ready when, in spite of the fact that the oven can have all 250 degrees of "heat", inside it has a temperature of 96-97 degrees.
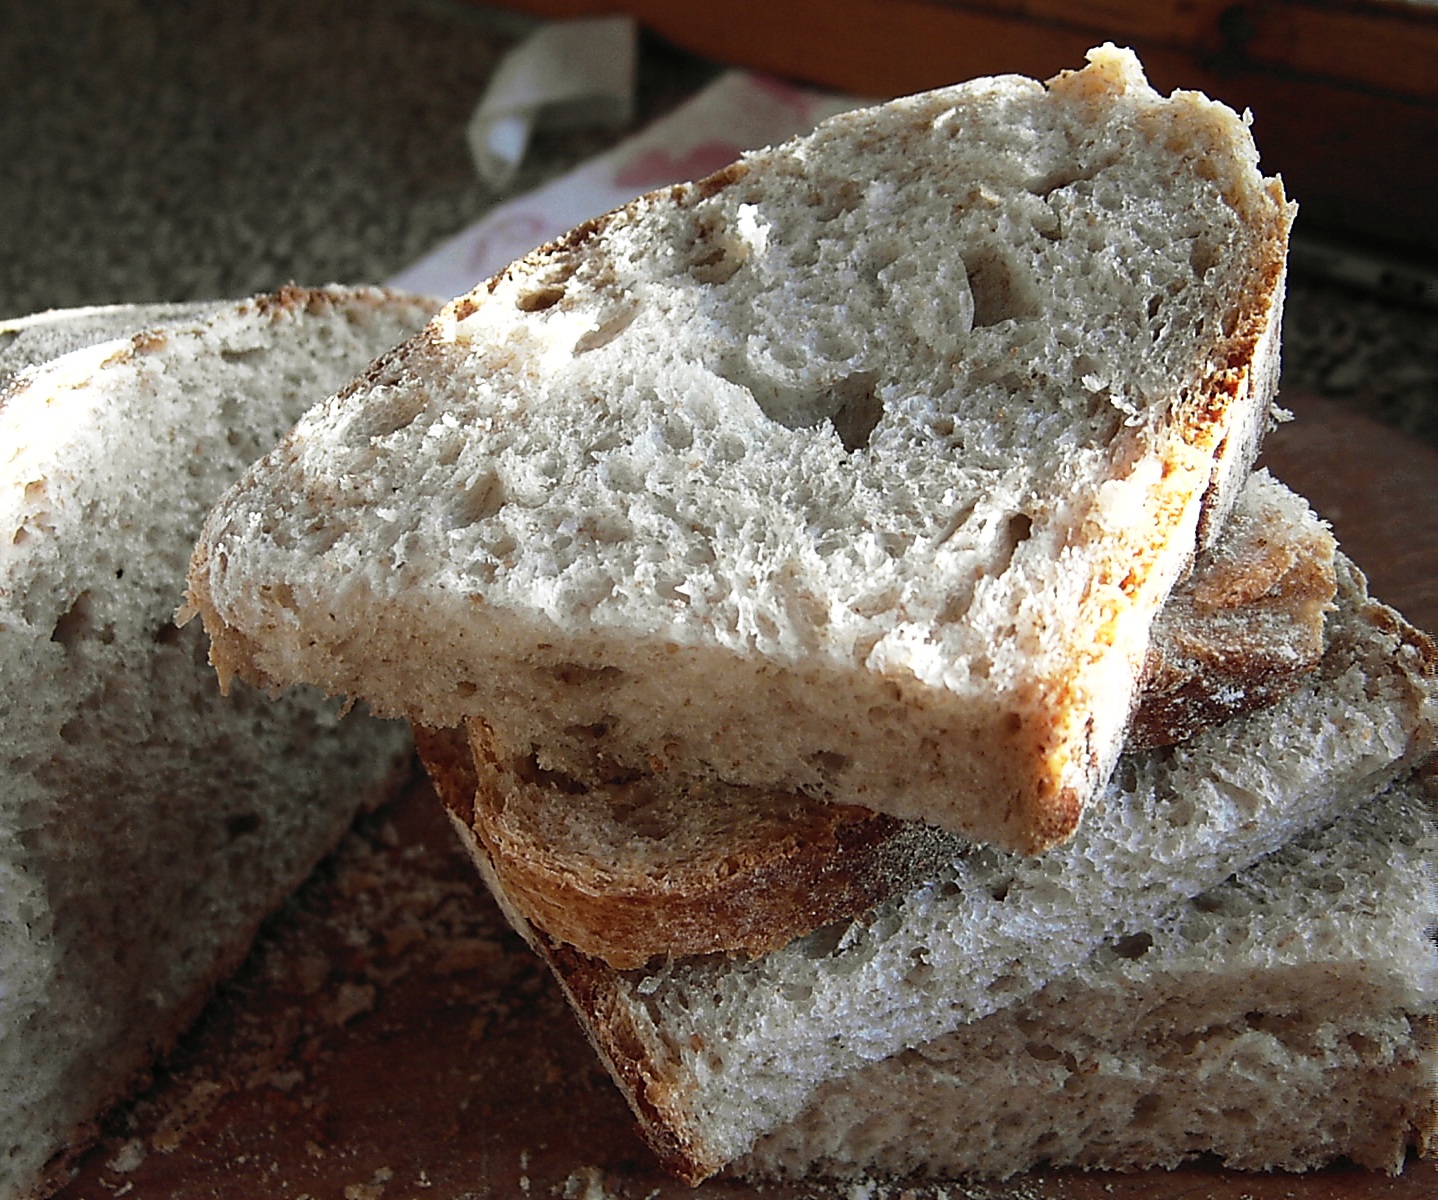
Bread baking begins with the fact that, once in the oven, it warms up rather quickly and in layers (we have already talked about the crust). Under the influence of heat, the yeast makes a "last spurt", their vital activity becomes very active, they release a lot of gas, the bread itself begins to evaporate moisture, which expands the pores, due to which the bread grows noticeably. Already at 50 degrees, noticeable changes take place inside the bread: inside it heats up and thickens due to the fact that the proteins curl up, and the starch gelatinizes, thereby forming the "frame" and structure of the bread. All these processes occur simultaneously and during the entire baking time, and begin at the very beginning. As soon as the temperature in the bread rises slightly and reaches 60 degrees, yeast and lactic acid bacteria die, and the bread in the oven stops "growing".
Note that before planting the dough in the oven, even quite thick, it still has a fairly high humidity, on average 50-70%, and at the time the bread is ready, its crumb becomes almost dry. During baking, starch absorbs moisture, making the crumb of the finished bread dry and non-sticky. This process takes place throughout the entire baking period and lasts until the bread inside, in the very center, reaches a temperature of 90 degrees. At this moment, practically nothing so revolutionary happens inside the bread, and the bread crumb is considered formed. The bread itself can heat up to a maximum of 96-98 degrees, it cannot get even hotter (unless it burns), because it spends heat to evaporate moisture from the crumb.
author Elena Zheleznyak published on the website 🔗
About steam
From the website 🔗
The steam is used to create a moist atmosphere in the oven during the first minutes of baking and to inhibit the formation of the crust. That is, stone and steam work together. The stone allows you to squeeze out the remnants of strength from the yeast as quickly as possible, and the steam at this time keeps the surface of the dough soft and elastic. In addition, steamed breads have a brighter, brighter, more attractive crust.
The standard way to get steam is to heat a cast-iron pan with a stone, and immediately after planting the bread, pour a glass of boiling water into it. Some people cover the pan with stones, this allows you to increase the thermal mass, surface area and, accordingly, the formation of steam. Actually, what I explain is that everyone was in the bath, everyone saw how it works. It is advisable to select the amount of water so that it completely evaporates in 10-12 minutes, by this time the bread has risen, and we do not need extra steam. Another option is to open the oven for the first few minutes every minute and sprinkle water on the walls. It's better than nothing, but much less efficient and highly dependent on the oven's ability to hold steam.
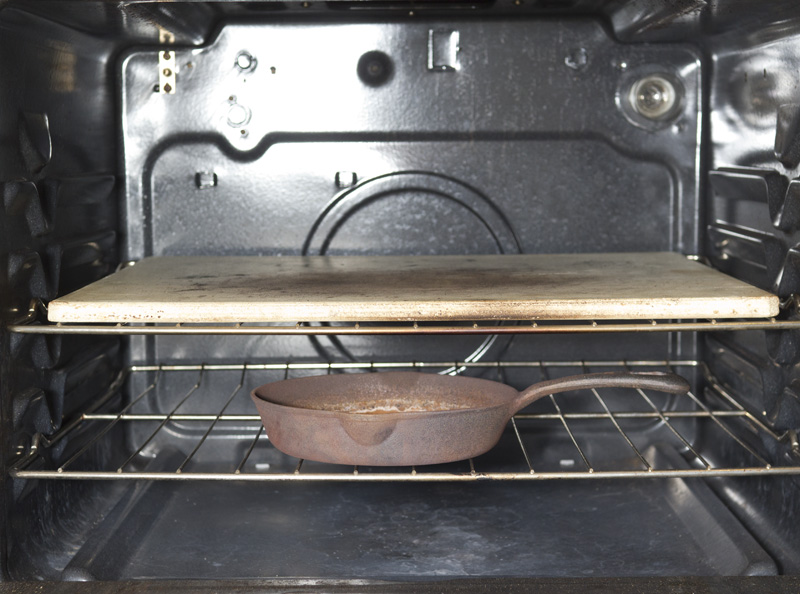 a stone and a frying pan - a standard layout for an electric oven
Actually this property, the ability of the oven to hold steam, is the reason for the main practical difference in baking bread.
in an electric and gas oven. The latter, for obvious reasons, does not hold steam., accordingly, neither a frying pan, let alone a spray gun, works here. Usually. It is for this reason that the technology of baking under the hood arose, which, if you think about it, is the same as baking in a pot, only upside down. The first caps were heavy - flower pots, goosebumps. This approach has crawled into books as well. For example, Layhey suggests using ceramic baking dishes, and the notorious Chad Robertson recommends a special combination of a cast-iron pot and a frying pan, where both can serve as either a dish or a lid. In fact, as practice has shown, the hood has only one task - to serve as a barrier for steam, so I use a solution that is both practical and economical - a gastronorm container. A gastronorm container, in English steam-pan, is a dish used in restaurants to keep food warm.I bought the thinnest and largest that fits in my oven, it cost a penny, but it works - you can't imagine better.
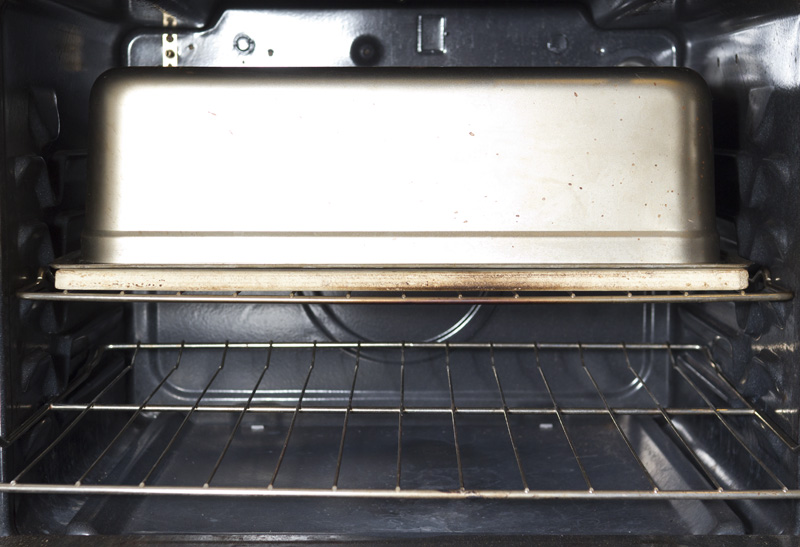 stone under the hood - with a gas oven this is the only way
TOPICS ON OUR SITE:Baking bread on a stone, stove in the ovenCeramic molds, caps, dishes, trays for baking breadBaking stone 