Wheat-rye bun
We read the definition of wheat-rye bread.
“In the name of bread from a mixture of flour, the predominant type of flour with a share of 50% - wheat flour is taken first place.
The flour ratio can be between 50-90% wheat flour and 50-40% rye flour.
For example, 40% rye flour and 60% wheat flour and so on. "We will bake bread with 60% wheat flour and 40% rye flour.The bread recipe is as follows:Wheat flour - 240 grams (or 60% of the total weight of all flour)
Rye flour - 160 grams (or 40% to the total weight of all flour)
Total flour = 400 grams
Dry kvass SAF - 2 tbsp. l.
Water - 90 ml
Dark beer - 150 ml
Vegetable oil - 2 tbsp. l (took mustard)
Honey - 2 tbsp. l (took buckwheat honey with bitterness)
Salt - 1.5 tsp
Yeast SAF-moment - 1.5 tsp
Instant chicory - 0.5-1 tbsp. l (added only to darken the bread)
Spices for bread - 1.5 tsp. (optional)
The recipe contains 400 grams of flour - but this is only an approximate amount of flour. How much flour actually goes into the dough will be shown by the bun, which you will learn about below.
We will bookmark products according to the principle
"Flour into water". This principle works very well when you are trying a new bread recipe and are not sure about the exact amount of flour and liquid and for kneading wheat-rye (or rye-wheat) dough.
Here is how V. Pokhlebkin (Secrets of good cuisine) describes this method:
The amount of flour is never determined in advance when preparing flour (bread) products, because everything depends on how much of the liquid mixture is obtained: what is its specific composition and how much flour this mixture can absorb. If, however, to determine the amount of flour in advance, then it is almost never possible to accurately adjust the liquid to it, because this value is a variable subject to fluctuations. Different fat content, milk density, water hardness, egg size, butter and fat consistency, as well as the freshness of the yeast and their effect on the liquid part also affect here.
Therefore, do not have much confidence in the recipe where the amount of flour is "precisely" determined for the bread dough. As a rule, it does not provide an opportunity to obtain a quality product, despite our best efforts. It is by this Pokhlebkin's rule that we will knead the dough for bread.
First, we weigh the flour on the scales - 160 + 240 = 400 grams as prescribed by the recipe.
Sift flour into a cup through a sieve (all together) to get rid of debris and saturate it with air.
I recommend immediately mixing the flour in one bowl until smooth, so that later you do not think what and how much flour you need to add to the batch - wheat and rye. Put the rest of the excess flour (if any) in a separate bag - it will come in handy the next time you knead the dough.
We put butter, honey, beer and water in a bucket of a bread machine - that is, all liquid products.
Then pour the flour into the bucket - but not all the flour !!!! Leave about 70-80 grams (per eye) of flour in the cup, we will add it to the bucket later, in the process of kneading the dough.
Now we put all the remaining additives on the flour in a bucket - kvass, salt, yeast, spices, chicory (you can not put it)
We put the bucket in the bread maker and select the program.
Since we bake wheat-rye bread, we can choose the Basic (Basic) program for the bread, for a time of about 3.20-3.50 hours (see the instructions).
Wheat-rye dough contains a large amount of wheat flour, therefore, the rules for kneading, proofing and baking wheat bread apply to this dough.
The main (basic) program has two dough proofers.
I (personally for myself) knead the dough on the Dough program, then I do the second proofing of the dough in the oven and bake bread in the oven too.
So you have a choice - to bake bread in the bread maker completely, or together with me in the oven.
So, we put the products in the bucket (not all the flour !!!) and turn on the bread maker on the desired program - the batch has started.
Then we look at the photos, and I make comments.1. Start mixing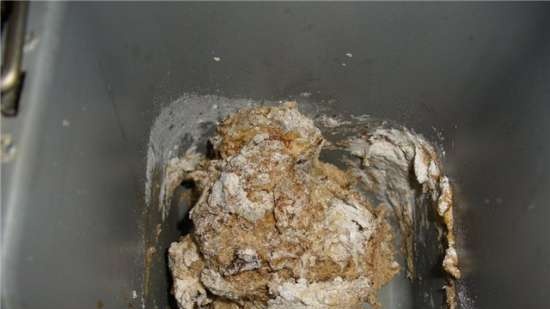
We see a batch of products. And you can immediately see that the dough turns out to be watery - this will not work for us.
2. Add flour from the remainder in a bowl - little by little and immediately we monitor the state of the kolobok. We constantly feel the bun for its softness - the further along the kneading time, the softer it becomes.
Here is such a bun after a portion of flour - about 3 tbsp. l poured flour.
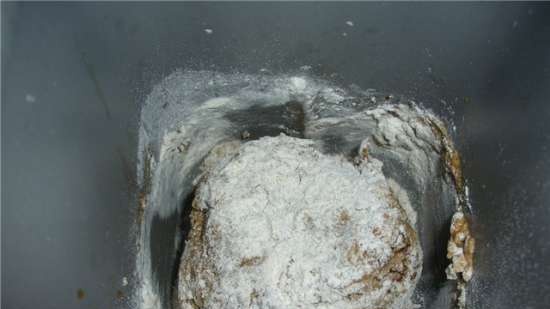 3. The kneading continues
 - now we have a neat little bun like a "tight rubber ball".
We collect the remains of flour from the sides of the bucket with a spatula - we continue kneading.
We will not add more flour - that's enough.
The gingerbread man has become as tight as an inflatable rubber ball, but it spins freely in the bucket (does not creak) and feels great.
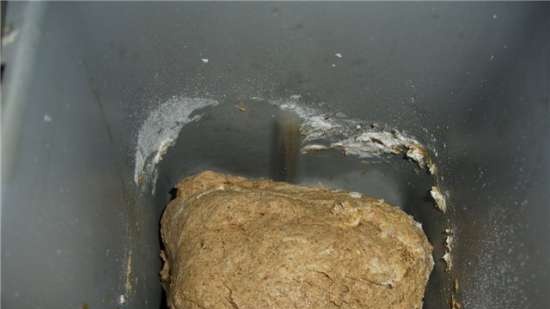 4. The gingerbread man becomes even softer
, we continue to check its condition by hand.
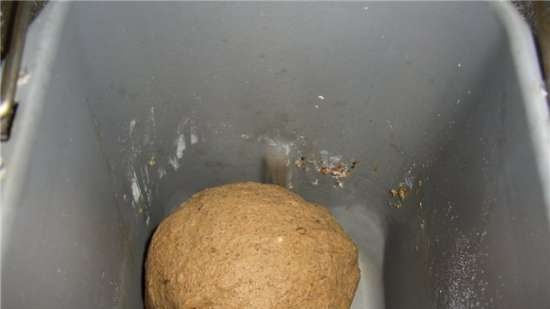 5. End of batch
 by program.
This is how much the bun has softened, that it has become imposing, lay down on the bottom, still resilient, but has already lost its shape a little. And I collected the rest of the flour from the sides of the bucket.
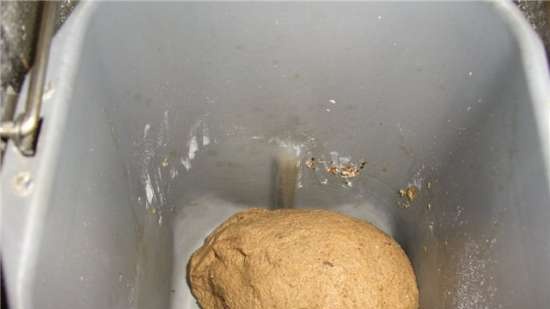 6. End of batch.
 Pause-break at the kolobok.
While the dough is resting, let's calculate the actual amount of flour the dough took from us according to the "flour in water" principle.
Remember: we had 400 grams of a mixture of wheat and rye flour. After the bun had formed and my addition of flour to the dough, I weighed the rest of the flour in a bowl - it turned out to be 40 grams. This means that 400-40 = 360 grams of flour went into the dough.
If we put all the 400 grams of flour at once when laying out the products, we would now have a very tight bun, which would not be interfered with by a bread maker. And I would have to add more water to the dough and it is not known how much water - 1 tbsp. l. But this is not so bad either.
Those who have added water to a kneaded kolobok know that after adding water, a flour slurry forms in the bucket, which is difficult to mix with the already formed kolobok, especially when it is a kolobok with the addition of rye flour. The gingerbread man stands "to death" and does not want to absorb additional liquid. And we are limited in mixing time. And the time of kneading is intended at this moment for the formation of gluten (which is already so scarce in rye flour), and we made a swamp. And in this slurry swamp it is much more difficult to see the re-formation of the kolobok, and to guess how much more flour or water is needed (and whether it is necessary) to add. If you don’t guess, you can still practice in the addition of flour and water for a long time - until the kneading time is over, and this will be the last batch.
A question at a time: what crumb will the finished bread get when kneading such a dough and in this way.
If we knead according to my (Pokhlebkinsky) principle "Flour into water", we will immediately, during the first batch, get that bun that suits us completely, and then we will only develop gluten in it during kneading.
7. The second batch of dough started (main batch).
In the process of kneading, we again check the state of the kneading - now the bun will only become even softer and softer - this is gluten working, the formation of gluten threads is going on, the basis of a good dough.
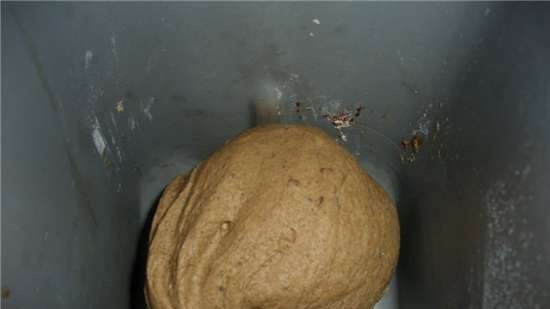 8. End of batch.
 It is not quite noticeable in the photo - but in fact, the bun is soft, fingers enter it freely. It's just that the bun also holds its shape a little. And we don't really need the slurry under the dough.
In general, the state of the kolobok is a purely individual matter for each of us - I do not like too soft kolobok with liquid under it - it is fraught with excess liquid in the dough and the failure of the dome. And then, I like the dry (not wet) crumb more in the finished bread.
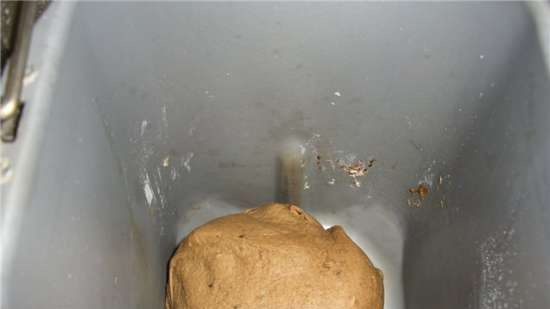 9. Gingerbread man after the end of the batch.
The first proofing begins, but I risked taking the dough out of the bucket to show you the state of the finished kolobok in all its glory.
Notice how soft the dough we got after kneading. As a condition - soft plasticine.
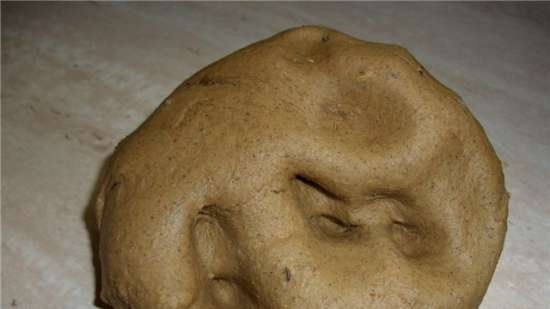
After itself, the dough leaves traces on the surface of the table.The dough is soft and sticky to the hands.
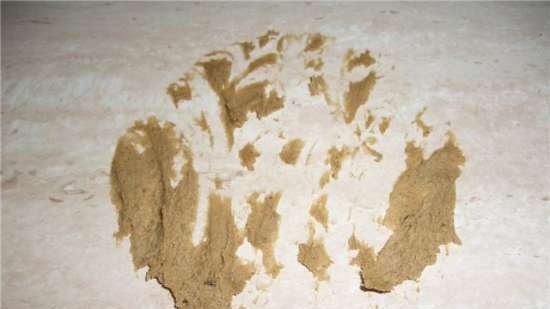
I throw the dough quickly into the bucket and the proofing continues.
I draw your attention to the fact that the first proofing may not be as high as you would like to see - after all, the presence of rye flour.
The Dough in the Bread Maker program finishes its work, you will need to take out the finished dough soon.
Here our paths diverge with you.
If you started baking bread with me in a bread maker (Basic mode (basic), then according to the program you will now have a deboning of dough, then a second proofing (total 2 proofings), and baking bread.
I take out the finished dough from the bucket and then I will cook it for baking bread in the oven.
10. Ready dough it looks like this after the first proofing - it didn't rise very high, but the dough is in small bubbles.
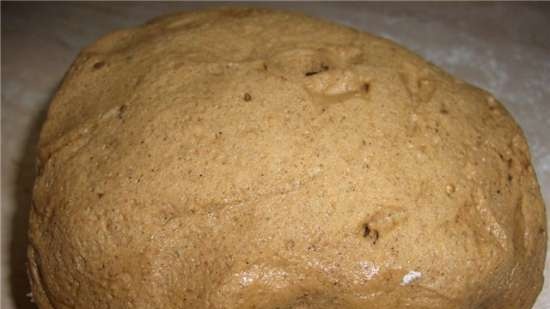
This is how bubble volcanoes look up close. You will not see such a picture, since the finished dough is hidden from you by the walls of the bread maker's bucket.
Look here at the finished dough, and imagine that it is in your bucket.
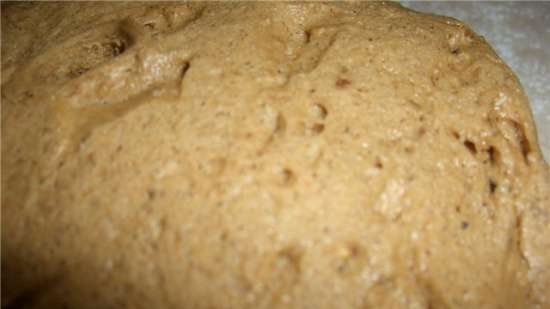 11. Prepare the dough for laying in the mold
... We form such a plump and even sausage from it.
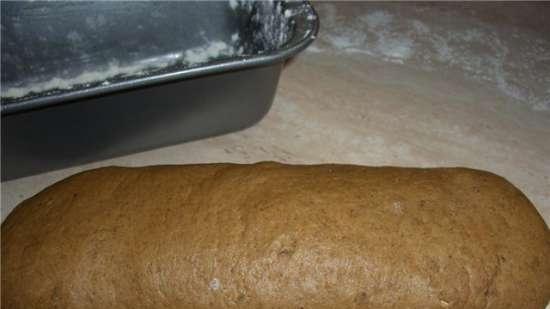 12. Laying in shape.
 Preparing the form for the dough. To do this, grease it with a little vegetable oil with a brush and sprinkle it with a little flour. Try to match the shape of your dough piece. It also depends on how your dough will distribute, whether there is enough space for proofing. I select the form according to the size so that the dough occupies 1 \ 3-1 \ 2 of the height in it and there is room for lifting.
We put the dough in a mold and compacted it a little so that there were no voids on the bottom and sides of the mold.
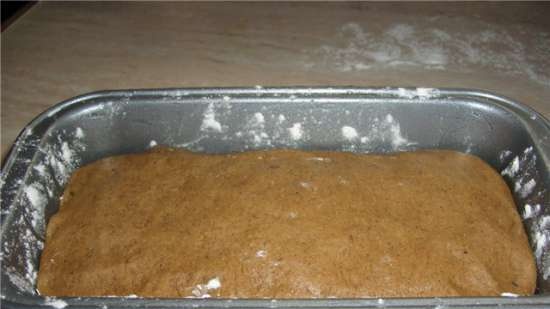 13. Proofing in the oven.
We put the mold with the dough in the oven at a temperature of 30 * C - the ideal temperature for proving the dough is 28-30 * C. The dough should increase by about 2 times or slightly higher. I never track the proofing of the dough over time. The dough itself should tell you when it is ready for baking.
For me, the landmark is an increase in volume and the appearance of small breaks on the side crust - take a closer look at the photo and see for yourself - where the workpiece comes out of the mold to the surface. Now you can place the workpiece for baking.
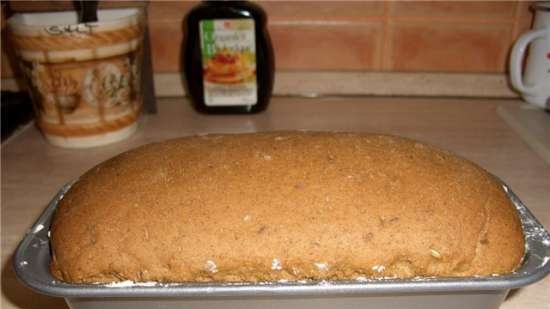 14. Baking bread.
I put the form in the oven and turn on the temperature by 180 * C. The oven was already preheated to 30 * C when proving the dough.
Now for some explanation why I am doing this.
There are two options for heating the oven and baking bread.
The first option is to first heat the oven to 180 * C and then put the dough piece into the already heated oven. In this case, the dough has a "shock" from the hot air. He sat quietly and comfortably in uniform, rose well and suddenly it was in a hot oven. The dough begins to rise quickly from the hot air and large gaps may immediately appear on the surface of the dome from a sharp temperature drop.
The second option is when the dough is baked in the oven at 30 * C and then the oven is heated up to 180 * C. The oven temperature gradually increases and the dough is gradually and evenly warmed up to the entire depth of the mold. There is no shock to the dough piece, no breaks in the dough and dome will occur.
The oven heats up to 180 * C for about 10-15 minutes - during this time, the dough piece rises evenly upward.
The dough in the oven should rise - this is the action of yeast and high temperature. But the rise will not be so big - only until the temperature inside the dough rises to 55-60 * C is the temperature of the yeast, above this temperature the yeast dies and the growth of the dough stops.
That is why I recommend proofing the dough only until it is doubled, then it will additionally rise even when the oven heats up - this is enough for lifting. At the same time, you can insert a temperature probe into the bread to control the readiness of the baking.
After the crust of the dough hardens and changes its color to dark, reduce the oven temperature to 165-170 * C and bring the bread baking to readiness. I check the readiness of the bread with a temperature probe - when the readings are 94-96 * C, the bread is ready.
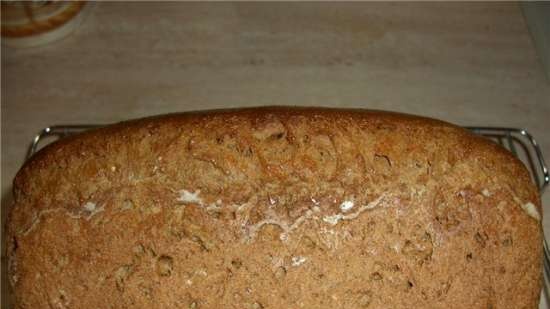
15. Ready bread. We take out the finished bread from the oven.You can see how much the dough piece has grown when the temperature in the ovens increases during the heating process (compare with the photo before baking).
The bread turned out to be even, neat.
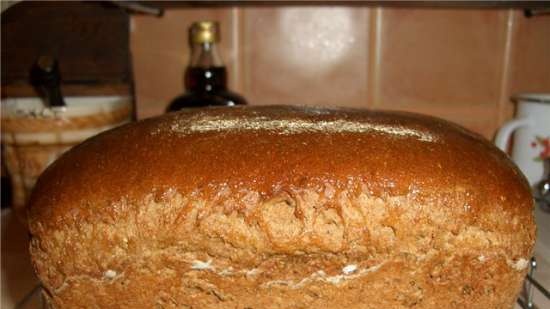
Now grease the dome of the finished bread with a little olive oil - the crust is glazed and will soften when it cools under a towel. It's nice to look at the bread - it turned out beautiful.
Now let's look at the side view - nice to look at too. The inside of the bread is very soft to the touch. Let's wait until the bread has completely cooled down and look at the state of the crumb. The crumb of finished bread can tell us a lot of interesting things - about the products in the recipe, about kneading, about proofing and about baking.
Here is the long-awaited cut of bread. Let me remind you that we baked wheat-rye bread.
As for the finished bread and crumb - the crumb turned out to be moderately moist, well-porous, soft. The taste - the presence of rye flour is felt, and it smells very pleasantly of spices for bread. It tasted good bread
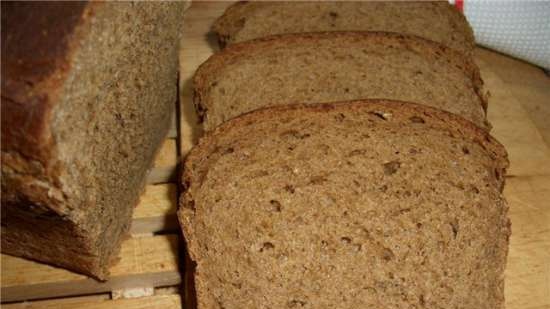
Here are slices of wheat-rye bread in a cut - a closer look and you can see the individual details of the baking.
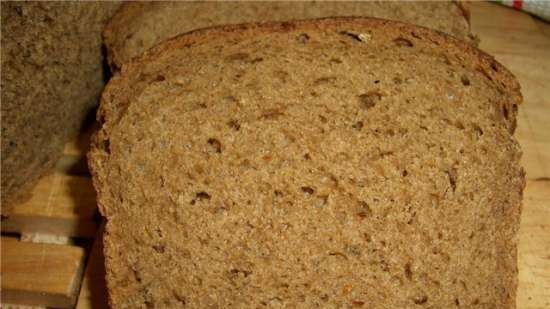
Everything!
I told and showed a small master class on baking wheat-rye bread in a bread machine and in the oven - choose an option and practice.
I hope that my notes will help you cope with Kolobok and baking bread and bring you a lot of joy from this fun process.
I wish you all good and successful pastries!
