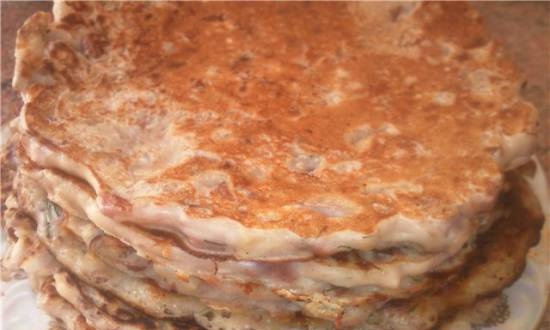
Fluffy bread on yeast-free sourdough

Category: Sourdough bread
Fluffy bread on yeast-free sourdough

Ingredients

Dough:
Wheat sourdough 100% hydration 50 g
Wheat flour 150 g
Water 150 g
Dough:
Opara all
Water 190 g
Wheat flour 550 g
Salt 1.5 tsp.
Sugar 1.5 tbsp. l.
Vegetable oil 3 tbsp. l.

Cooking method

  • Fluffy bread on yeast-free sourdough
  • HURRAH!!! I did it! Finally, I groped for the very bread that I wanted for so long! The pulp is fluffy, airy, and the crust is the finest and crispest. And the taste is mmm ... awesome. Girls and boys, well, I can't help but share the recipe for this yummy! Thanks to my patient teachers, whom I so often fiddled with with my questions and whose works I read and reread. Viki, Omela, Zest, Kava - thank you all!
  • • We take an active wheat sourdough of 100% hydration (I have a French woman), knead the dough and leave it in a cool place for 8 hours. Well, for example, we put the dough in the evening, and in the morning we knead the dough. Or we immediately take 350 g of mature sourdough at the peak of growth (so that it would not be peroxidized) and then skip the step with the sourdough, and immediately proceed to kneading with the dough.
  • * I tried this and that, both times the result is excellent!
  • • Knead the dough with the rest of the ingredients, put it in a bowl (I slightly grease it with oil, so that it would be easy to remove the dough from it later, without sticking), cover it with a film, put it in a warm place and let it rise 2 times. This takes about 2.5 hours. (The rise time depends on the strength of your culture.)
  • Fluffy bread on yeast-free sourdough Fluffy bread on yeast-free sourdough
  • * I baked this bread on a French woman and on a “refeeding” (2 times refeeding from rye to wheat). "Overfeeding", oddly enough, coped with the task faster. Although she put the dough at the same time. Then I'll show you a photo below.
  • • As soon as the dough comes up twice, we carefully take it out so as not to release bubbles from the dough and form bread to your taste.
  • Fluffy bread on yeast-free sourdough
  • • I don’t have a distance basket yet, so after shaping the bread, I put it on proofing paper, sprinkled with cornmeal and covered with cling film.
  • * I take the paper from Paclan, it does not stick, but the Sayana paper, unfortunately, sticks even when oiled, alas ...
  • Fluffy bread on yeast-free sourdough
  • • The future bread is parted somewhere from 40 minutes to 1.5 hours (again, the time depends on your leaven). For example, my bread on the "refeeding" after molding increased in volume 2 times after 30 minutes, and on a Frenchwoman - after 1.5 hours. (Apparently, she has weakened, but now a new Frenchwoman is already ripening, she started it for comparison, so we'll see how she handles soon.)
  • * An old method helps me to determine the time of planting bread in the oven, which I read about somewhere on our forum at Viki, for which special thanks to her.
  • I pinch off a piece of dough the size of a walnut, form a ball out of it (quite dense) and immerse it in a glass of water at room temperature. As soon as the ball floats up, the bread can be put into the oven.
  • Fluffy bread on yeast-free sourdough Fluffy bread on yeast-free sourdough
  • • We make cuts on the bread (whoever has enough imagination), how to spray the bread from a spray bottle
  • Fluffy bread on yeast-free sourdough
  • • Cover with a lid and place in an oven preheated to 240⁰C for 15 minutes.
  • • After 15 minutes. remove the lid and bake the bread for another 30-35 minutes at a temperature of 180⁰С.
  • * The readiness of the bread is determined by my grandmother's method - a wooden torch. I pierce the bread deeper in the least noticeable place and pass it over the upper lip with this splinter, if moisture is not felt, then the bread is already ready. And also, when you take hot bread in your hands and knock lightly on the bottom, then the sound comes from it, as if it were empty.
  • • Lubricate the hot bread with vegetable oil using a silicone brush, wrap it with a linen towel and leave to cool on the wire rack (so that the bottom does not become damp). And we keep the defense from persistent household members who want to snatch a crust of hot crispy bread. Oh ... I myself can hardly restrain myself every time.
  • All! Our bread is ready! We remove the defense from the family, languishing with impatience and gladly treat them from our bounty!
  • Fluffy bread on yeast-free sourdough
  • Fluffy bread on yeast-free sourdough


Arka
Nice fluffy bread! Well done!
Ilona
Thank you, I tried! A little later I will lay out how it turned out in a bread maker. It's also tasty, but you can't compare it with an oven.
Omela
Ilona, great bread turned out !!!
iiirrraaa
that's what beauty is in the world and

Quote: ilonnna

A little later I will lay out how it turned out in a bread maker. It's also tasty, but you can't compare it with an oven.

yeah, it's interesting about baking!
Ilona
And here is the bread baked according to the same recipe in a bread machine.
Fluffy bread on yeast-free sourdough
I divided the dough in half with the help of scales and mixed one part, let it stand and bake, as described above, and the other in a bread maker on the mode
"your recipe":
1. Kneading the dough - 14 min.
2. First proofing - 30 min.
3. Second batch - 5 min.
4. Second proofing - 1 hour 30 minutes.
5. Third proofing - 1 tsp.
6. Baking - 1 tsp.
The crust is medium.

Here is such a bun turns out:
Fluffy bread on yeast-free sourdough
This is how the dough looks 15 minutes before baking.
Fluffy bread on yeast-free sourdough
Well, here's the result:
Fluffy bread on yeast-free sourdough

As you can see for yourself, although the dough is the same, the result is different. Of course, this bread is also delicious, the softest with a thin crust, but even by eye it is clear that it is inferior to its spiritual brother.
Ru
ilonnnait looks like your bread will be the last straw that will force me, lazy before baking in the oven and indecisive about growing sourdough, to get involved in this epic.
Ilona
Quote: Ru

ilonnnait looks like your bread will be the last straw that will force me, lazy before baking in the oven and indecisive about growing sourdough, to get involved in this epic.

Get involved already, believe me it's worth it! I also thought that for no reason and never, why an oven if there is a bread maker? But no ... it's worth it, though cumbersome, but addictive! And how nice it is to feel the pliable dough in your hands, mmm ... This is some kind of art therapy) It's especially nice when the results are pleasing.
By the way, how much depends on flour yet, although it is not a secret, everyone already knows this and I have been convinced of this more than once when baking cakes, but bread seems to me more "sensitive" to flour. Here is the best bread, according to the same recipe, I got from bakery flour of the highest grade of CJSC "Yug Rusi" branch Salsky. Honestly, the veteran took it in the department, thinking that this is probably fig flour, because they always sell garbage on the social card, and to my surprise, she showed herself from the best side (the photo shows the result). And from flour Nekrasovskaya general purpose such bread does not work (well, this is understandable), and surprisingly, for some reason, for a well-proven "Makfa" too (maybe the "left" Makfa got caught).
Ilona
Quote: Omela

Ilona, great bread turned out !!!

Thank you, Omela, not without your help, thank you for the sieve and for the carpenter and for the beer buns and, of course, for the help when, like a blind kitten, poked around the forum, not knowing where to start and how to do everything correctly. : rose: And thanks to all the girls
lesla
Thanks for the tip on how to determine the time of planting bread in the oven, I hear it for the first time, I will definitely use it. and I also wonder what happens to the bread under the lid
Ilona
Quote: lesla

Thanks for the tip on how to determine the time of planting bread in the oven, I hear it for the first time, I will definitely use it. and I also wonder what happens to the bread under the lid

This is not thanks to me, but to our grandmothers, and I learned about this from our Viki moderator!
It is baked under the lid for the first 15 minutes. with steam. We spray it from a spray bottle before planting it in the oven. Bread, getting into the oven for the first minutes, still "rises", and the moistened surface can remain elastic longer, and not immediately turn into a crust.In fact, we don't seem to limit bread in the ability to grow as much as possible. As I understand it. Can Viki will correct if I am mistaken?
Viki
Quote: ilonnna

Can Viki will correct if I am mistaken?
That's right!
For baking with steam, we have two options: either we pour water into the pan, where it will evaporate for ourselves, pour it so that it lasts for 15 minutes, or sprinkle the bread lightly and cover it with a lid, limiting the steam output.
Ilona
Viki, thanks for the support and, so to speak, for the "parental control"
Ilona
By March 8, she baked a couple more: she drove one to the granny in the village, and left the bar for the arrival of the guests. Om-Nom-nom!

Fluffy bread on yeast-free sourdough Fluffy bread on yeast-free sourdough Fluffy bread on yeast-free sourdough Fluffy bread on yeast-free sourdough
tvfg
About baking in a simple oven, you can get more details and how to do without a pan?
Ilona
tvfg, I just bake in the most, that neither is a simple oven of 80, and with broken thermal insulation (at one time my mother for some reason decided that the foil was not thermal insulation, but the remains of the packaging and ... and managed to peel off half before Dad arrived in time), and now my old lady also has a deformed door that does not fit snugly, alas, and in general, this door is kept on a garment garment. Nothing - the bread turns out
If you do not want to bake in a container under a lid for the first 15 minutes, then you can bake on a baking sheet (but also cover it with baking paper and sprinkle with flour. Sprinkle the bread bread and put it in the oven. that the bread would be baked with steam.
Good visibility

I will wait for your bread
tvfg
Thank you! What a film under the bread. I have already doubled it
after kneading 2 hours. I think the oven is right on the pan in 3 hours. I'm leaving even if I didn't fall during this time
tvfg
Than paper can be replaced, otherwise it is dumb.
Ilona
well ... oiled and floured tracing paper. But it may still fail ...
Ilona
in general, you can sprinkle a baking sheet with flour (I sprinkled it with semolina, I remember ...) With paper and with high-quality it is easier of course ...
tvfg
When detuned, it was torn in the tar.
Ilona
Quote: tvfg

When detuned, it was torn in the tar.
tvfg, when proofing? Probably when baking? If so, it means that it has not yet settled down with you, it was put into the oven early. The formed bread had to grow up before baking.
tvfg
I took a picture looking for how to insert and have already started baking
tvfg
So he grew grew pouted and tore in the middle.
Ilona
Quote: tvfg

So he grew grew pouted and tore in the middle.
that is, how did I understand before baking? Well ... it has stopped means ... here you need to catch the moment when it's time to plant it in the oven. I am guided by a piece of dough in a glass, but by the dough itself (grown by 2 p and that's enough)
tvfg
So went away for 3 hours
Ilona
Quote: tvfg

So went away for 3 hours
Well ... so this is the reason and the result ... It turned out to be a lot ... it can sour, but it will still be edible
tvfg
Can I start baking bread immediately in a cold oven?
tvfg
The point is to heat it.
Ilona
In the cold, no, it's not worth it ... yes ... I feel you are developing a new technology there. Didn't finish watching, didn't warm up, didn't finish the next stage?
Viki
Quote: tvfg

So he grew grew pouted and broke in the middle.
Insufficient distance or not incised, or shallow incision depth - torn.
BUT! It seems that in your case - he did not have enough steam or the top was not sprayed with water, which makes the top crust elastic so that it does not tear. Or maybe several factors at the same time?
Well, let's look for the reason together ...
Ilona
Quote: Viki

Insufficient distance or not incised, or shallow incision depth - torn.
BUT! It seems that in your case - he did not have enough steam or the top was not sprayed with water, which makes the top crust elastic so that it does not tear. Or maybe several factors at the same time?
Well, let's look for the reason together ...
Vika, at first I also blew that the dough had not matured, so it turns out tvfg writes that it cracked even before baking, which I left for proofing and for 3 hours. gone. 3 hours. Of course this is too much, but did it crack the bee? ... How could THAT be? Well, it could settle, having fermented too much time. Or ... or it came ...he probably didn’t cover it with anything, the top was windy, and from the inside his pearl ... so it "cracked" raw.
tvfg, show that you did it in the end? And then you wanted to bake in a cold oven ...
tvfg
Thank you. I baked it in a preheated oven on a pan, the bottom burned a little for some reason :) I kneaded the dough in liquid sourdough without adding water, then detuning for 2 hours in a closed cup and 3 hours on a pan. What's wrong
tvfg
Yes, and shrunk in size in the oven.
Ilona
Quote: tvfg

Thank you. I baked it in a preheated oven on a pan, the bottom burned a little for some reason :) I kneaded the dough in liquid sourdough without adding water, then detuning for 2 hours in a closed cup and 3 hours on a pan. What's wrong
Duc you, what did you do not according to the recipe? Why without water then? How much leaven did you take, how much flour? And what do you call liquid injection, 100% voice? And in the next. do not leave for 3 hours on the last proofing.
tvfg
I had 3 cans of 0.5 liters of active liquid starter culture and mixed it with flour MUG, salt, sugar. Rolled the bun and added flour to the norm
Ilona
Is it you that you used the shop type "Agram" or raised it yourself? In general, you are 100% off the recipe
I wish you the next more successful attempts. At first try not to deviate from the recipes you have chosen, and with experience, of course, you will change something and create your own. In the meantime, you need to learn to "feel" the bread! Good luck in your new achievements! We are waiting for new reports
tvfg
I grew it myself on rye flour and malt. I want to learn to "feel" the bread! Waiting for answers
tvfg
I read that on such a leaven the dough is upset for 12-15 hours
Ilona
Quote: tvfg

I read that on such a leaven the dough is upset for 12-15 hours
On "such" it is on what? and where did you read it? Became interesting...
Ah ... litter, I didn't read it higher ... in rye. Duc ... this is ... when you bake rye bread, you can let it ferment for 12 hours. fed sourdough, because sourness is welcomed in rye bread, but not on the contrary in wheat bread. What did you want to bake at all? Otherwise, it seems to me that you did not plan the right bread at all initially
For this recipe, which in general in this thread (that's me ... I remind you) you can also take 50 g of yours, feed her with 150 g of flour and 150 g of water, let her come up in half and knead the dough on it, as described above in the recipe, that is, add more flour 550 g, water 190 g, salt, sugar and odorless vegetable oil. Let it rise 2 times too, shape the bread and put it on proofing (well ... for 30-60 minutes, you need to see what would rise again. Then into the oven, well, etc. Then everything should work out and will not sour. Everything, try it! Good luck!
tvfg
Flour 550 g is about 2 glasses? Sorry no scales.
I feed the sourdough with wheat flour
tvfg
How do you store the starter culture and how do you restore it later?
Admin
Quote: tvfg

Flour 550 g is about 2 glasses? Sorry no scales.
I feed the sourdough with wheat flour

Amount of main ingredients in one measuring cup and spoon https://mcooker-enm.tomathouse.com/index.php@option=com_smf&topic=8236.0
tvfg
Thank you ! I wanted to learn more from you the basics of baking in the oven
Ilona
Quote: tvfg

How do you store the starter culture and how do you restore it later?
You need to store at a temperature of 12-15 degrees. I have just 12 on the top shelf of the refrigerator. It is not possible to lower it, since lactic acid bacteria fall asleep and only wild yeast multiply. And at high temperatures you are tortured to feed her constantly, it will grow rapidly.
I do this: I take a small piece of sourdough (20-25 g somewhere) and feed it to the trail. way: I add water 50 g and flour 50 g, mix and leave on the table for an hour, and then put it in the refrigerator on the top shelf. There she "waits" for me calmly for 3 days. If you feed her with a large amount of flour and water, then it will stand for 5 days. Then, before baking, take part of the sourdough and knead the dough, and feed the part until next time.
tvfg
I read that you can dry it on paper and then use it.
Ilona
Quote: tvfg

I read that you can dry it on paper and then use it.
I also read it, but this is when you have too much of it, but it's a pity to throw it away, or you go on vacation and there will be no one to feed. It will still need to be restored later, so if you bake it regularly, then I don't see the point - an extra step.
Ilona
Yesterday I baked "Fluffy" bread again, but decided to experiment and replaced 200 g of flour with whole grain flour, because I had read a lot about its benefits for a long time and had long wanted to try it in business.I got a packet of such flour (though it turned out to be too expensive, as much as 157 rubles per kilogram packet, but it is my own fault, I will not sit down to order it in Platypus). In general, the bread turned out, as always, soft, with a crispy crust, fluffy, and the taste is very unusual. Whole grain flour gives it a nutty flavor. Everyone at home really liked it, so we will repeat!
The photo shows blotches from whole grain flour:
Fluffy bread on yeast-free sourdough
tvfg
You have got a beautiful bread: hi: How many times it grows in the pan during baking.
Ilona
Quote: tvfg

You have got a beautiful bread: hi: How many times it grows in the pan during baking.
Yes, not very much, he already grows in the oven, 1.5 times - 2 somewhere. In the very first post with the recipe in the pictures, you can see raw bread before baking, lying in a container (the black one in the picture), so after baking it grows a little wider and upward, but it does not reach the walls of the container (there is still a couple of cm), so do not worry, a huge card is optional

All recipes

New recipe

© Mcooker: best recipes.

map of site

We advise you to read:

Selection and operation of bread makers