Funai FAB-300-2 Bread Maker Instruction |
FUNAI FAB-300-2 BREAD Maker OPERATOR'S MANUALELECTRIC OVEN FOR BAKING BREAD A wide range of baked breads of different types 
model FAB300-2 Please take a few minutes to read the operating instructions. If you follow the instructions carefully, your bread maker will serve you for a long time and trouble-free. IMPORTANT PRECAUTIONS .......... FURNACE PARTS AND THEIR INSTALLATION ........................ CONTROL PANEL ....................................... INSERTING THE BREAD FORM ..... SELECTING THE MENU ......................................................... BAKING BREAD ................................................... Fully automated mode ................ Manual mode for kneading dough only ................. Using the programmable timer for baking bread or kneading dough .......................... Removing baked bread ............................... SAFETY INSTRUCTIONS ............................................. MAINTENANCE OF THE ELECTRIC OVEN ................................... SPECIFICATIONS ..................... IMPORTANT PRECAUTIONSFor home use onlyWhen using electrical appliances, the following basic precautions should always be observed: 1. Read all instructions before using this appliance. 2. Do not touch the hot surface. 3. To avoid electrical shock, do not immerse the cord, plug, or apparatus in water or other liquid. 4. To avoid injury or burns, do not put your hands inside the oven while it is operating. 5. An adult must be present when the oven is used in the immediate vicinity of the child or by the child. 6. Unplug from the mains when not using the stove or before cleaning it. Refrigerate before opening and removing parts. 7. Do not use any electrical appliance with a damaged cord, plug or any damage. Return the instrument to the nearest service point for inspection, repair or adjustment. 8. Using attachments that are not recommended by the manufacturer may result in injury. 9. Do not use outdoors. 10. Do not leave the cord hanging over the corner of the table or touching hot objects. 11. Do not place on a hot gas or electric stove, or in a heated oven. 12. Special precautions must be taken when carrying an electric oven containing hot liquids. 13. When using an extension cord, in any case, connect it to the oven cord first and then to the wall outlet. To disconnect, first turn off all buttons on the oven, then unplug the power plug from the wall outlet. 14. Do not use the device for other purposes. FOLLOW THESE INSTRUCTIONS.Shortened power cord This oven is equipped with a short power cord in order to reduce the risk that could occur if it gets caught and pulled out of the socket. Be careful when using an extension cord. When using an extension cord, ensure that (1) the voltage indicated is the same as the voltage of this apparatus, and (2) that the cord does not hang over the surface of the table, so that there is no risk of tangling in it or accidentally pulling it out of the outlet. If the oven is equipped with a grounded plug, the extension cord must also be of the grounded type. Always keep the power cord dry, do not bend it or place other objects on top of it.
Ventilation holes Air ventilated through these openings.
Heater intended for baking bread.
Shaft rotates the kneading paddle.
Cap 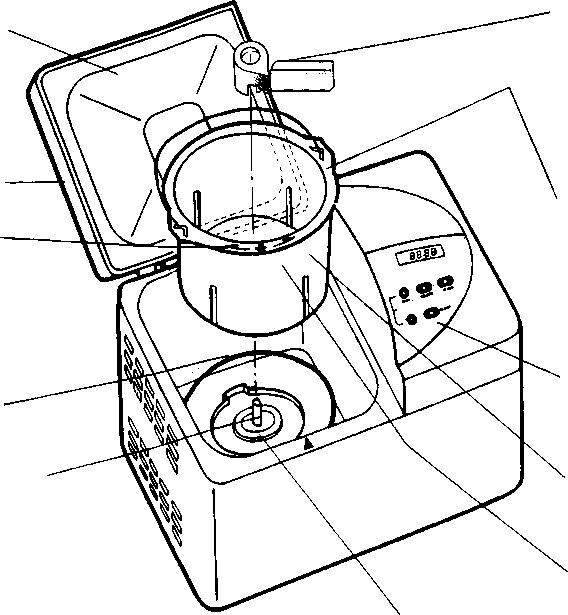
Dough mixer blade Kneads the dough
Baking dish. In this form, dough is kneaded and raised, bread is baked and cooled.
Control panel Bread baking operations are controlled by microcomputer. Pulling direction
Rubber gasket Rubber gasket must be installed to prevent leakage
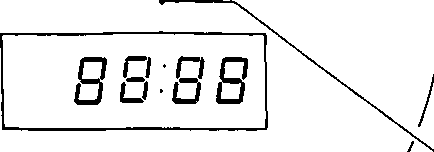
I I I AUTO — MED DARK LIGHT 
Manual mode Setting for kneading dough only Button "START" starts the process of making bread Programmable LED timer for programming bread baking for 12 hours
The “SELECT” button is used to select the bread crust you want: medium toasted, dark or light
INSERTING THE BREAD FORM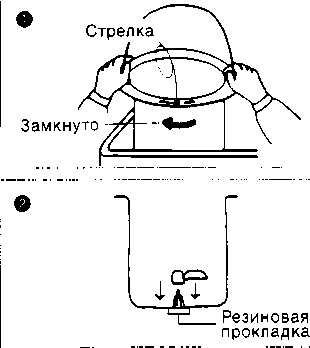
Place the mold in the main oven block with the arrow on the rim of the mold towards you, and then turn the mold clockwise to the limit. To extract the shape, turn it counterclockwise. Place the dough mixer blade on the shaft. After each use, wipe the inside of the oven with a clean cloth slightly dampened with hot water and dishwashing detergent. Wipe with a slightly dampened cloth before use. Never pour water into the oven. SELECTING THE MENUPlug the power cord into an AC outlet. The indicator for the automatic medium baking (MED) will light up. Click the button "SELECT" to select the desired mode. Notes: • Modes of medium, dark, light and manual bread can be set. • The medium, dark and light bake settings refer to the color of the crust or the degree of baking of the bread. • Manual mode is only used for kneading dough. Bread is not baked in this setting. Use this mode to knead pizza dough, rolls, bagels, etc. BAKING BREADFully automated modeCheck that the form is correctly set. Prepare and add all the ingredients for baking bread as directed in your recipe. 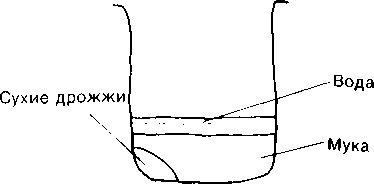
Put dry yeast first, then other products in the mold. All ingredients, except water, should be at room temperature. Note: ‘Additive dry yeast For better bread baking, add dry yeast around the edges of the pan. Add a small amount of hot water (about 40 ° C) as directed in your recipe. Push the button "SELECT" to select auto mode: medium, dark or light coloured. The bread will be baked according to the selected setting. Three different settings refer to the color of the crust and the degree of baking of the bread. © Press the start button to start the bread baking process. After about 2 hours and 15 minutes, your bread will be baked. The LED indicator will show the time remaining until the end of baking. A signal will inform you about the end of the baking process. Then the oven automatically enters a 1 hour cooling cycle. • It is preferable to remove the baked bread from the electric oven immediately after the end of the process. If you leave the bread in the electric oven after baking, the bread may get wet. • If you remove bread from the electric oven before the end of the cooling process, press the "CLEAR" to turn off the electric oven. • Press the key "CLEAR" for more than 1 second. • Baking special types of bread, cooling process Raisin breads and other breads can also be baked with ingredients according to your recipe. Ingredients such as raisins and nuts should be added 25 minutes after pressing the button "START", when the signal sounds 10 times. • Do not turn on the electric oven again immediately after baking. Allow the oven to cool down to room temperature. • WARNING: The electric oven is extremely hot after baking. Use oven mitts when handling metal parts (inner surface, mold, mixer blade). Manual mode for kneading dough onlyOnly the dough is kneaded in this mode.The manual mode is used only when kneading dough for pizza, rolls, bagels, etc., which must be hand sculpted and baked in a conventional oven. ABOUT Check that the mold is in the correct position. Prepare and place all the ingredients for the bread or dough as directed in the recipe. О Add the dry yeast first, then the other ingredients into the mold. All ingredients except water should be at room temperature. Note: • Adding dry yeast For better baking, add dry yeast around the edges of the pan. Add a small amount of hot water (about 40 ° C) as directed in your recipe. ABOUT Press the “SELECT” key to select manual mode. ABOUT Start kneading the dough by pressing the “START” button. The LED indicator will show the time remaining until the end of the kneading process. Note: “25 minutes after pressing the“ START ”key, a beep will sound to indicate the optimal time to add other ingredients such as raisins, etc. ABOUT The dough is done when the beep sounds for 5 minutes. Note: • If you want to turn off the alarm, press the “CLEAR” key. • Press the “CLEAR” key for more than 1 second. ABOUT After the dough is ready, remove it from the mold. Using the programmable timer to bake bread or knead doughABOUT Check that the mold is in the correct position. Prepare and place all the ingredients for the bread or dough as directed in the recipe. © Add the dry yeast first, then the other ingredients into the mold. Note: "Adding dry yeast For better baking, add dry yeast around the edges of the pan. @ Add a certain amount of hot water (about 40 ° C) as indicated in your recipe. ABOUT Press the key "SELECT" to select the mode: medium, light, dark or manual. @ Determine the desired end time for baking bread or dough. Then, calculate the number of hours remaining from present time to the end time. Enter in the memory of the electric oven the number of hours and minutes remaining until the end of the preparation of bread or dough. For example, the present time is 1:00 pm and you want the bread to be baked at 6:10 pm. Press the key "TIMER" (A) until the display shows 5:10 (which means 5 hours and 10 minutes). The numbers will light up on the display and turn off. Press the key "START", to fix the set time in the memory of the electric furnace. To erase the recorded time, press the key for more than 1 second. "CLEAR", to turn off program mode. Follow the same procedures to program manual kneading. Note: • Time is set only by entering 10-minute intervals. The time is programmed within the limits shown in the following table. Programmable time 'min. , max. j Completely! „! ^ automated mode : ’5:00 ' 12 hours j Manual mode j 1 hour ' 10 hours j Do not use the programmed function to bake bread or knead dough containing easily perishable foods such as eggs and milk, or ingredients that absorb liquids such as oats, etc. Extracting baked bread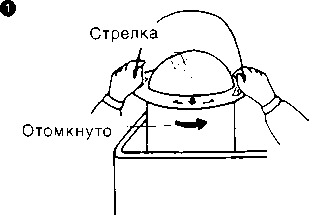
ABOUT Turn the mold counterclockwise to remove it from the oven housing. 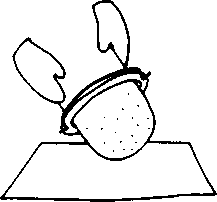
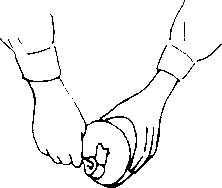
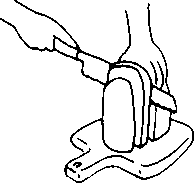
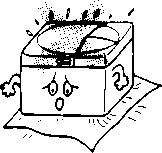
Turn the shape upside down and carefully | extract the baked bread. '0 Using a plastic or other non-metallic object, remove the dough kneader blade located at the bottom of the bread. Let the bread cool to room temperature temperature, then cut as desired and serve. Warning: All metal parts of an electric oven become extremely hot during and after the baking process. SAFETY INSTRUCTIONS Bread baking process• Do not touch the body of the electric oven as it becomes extremely hot during baking and immediately after the end of the process. Be especially careful when children are around.Always use oven mitts when removing freshly baked bread. Pay particular attention to ensure that no flammable objects are placed on top of the electric oven, as this may result in a fire. Position• Do not block the air passage through the openings located on the bottom of the oven body. • Do not use the electric oven near any flammable objects, in places subject to direct sunlight or rain, or in other inappropriate places, as this may result in malfunction or damage. 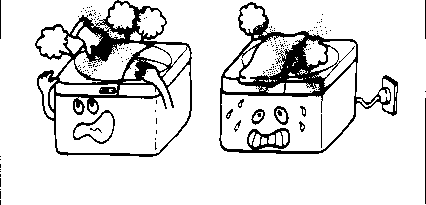
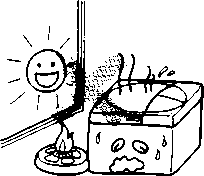
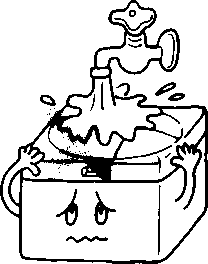
Power source• Plug only into a properly wired 220-230 V, 50 Hz AC outlet. • Never plug into the same outlet together with other electrical appliances. • Unplug the power plug if the oven is not used for a long time. Furnace main unit• Do not immerse the main unit of the oven in water, as this may result in electrical shock and other malfunctions. 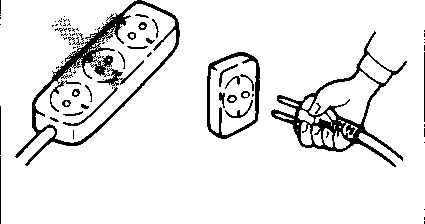
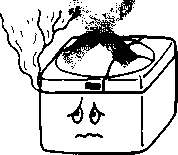
Bake • Flour, bread crumbs or other foreign objects accumulating inside the oven may prevent the pan from being installed. • Flour and other substances spilled on the heater can cause smoke to develop during baking.
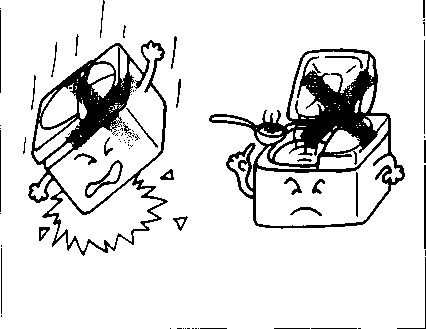
Handling an electric oven • Do not throw or hit the chassis strongly as this may result in improper operation. • This electric oven is only intended for baking bread. Use only ingredients for baking bread.
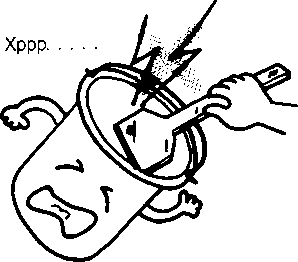
Seek the advice of your qualified service personnel if: • There is a damage or defect in the power cord. • The oven does not work as expected. • The plug becomes extremely hot during oven operation. • Other unexpected damage is found. When the power supply is cut off while the electric oven is running • If the power supply is interrupted or if the oven is accidentally disconnected from the mains while baking bread, the program will automatically stop running. To continue, remove all ingredients from the pan, refill with fresh ingredients and start over. • Same for the programmed baking mode. If the supply of current is interrupted or if the stove is accidentally disconnected from the mains, when the timer is activated, the program is automatically turned off and the stove goes into automatic mode. If the oven was in the process of baking bread, remove all ingredients from the pan, put fresh ones again and set the timer. If the timer has not been activated and the bread baking process has not started, then you only need to set the timer. MAINTENANCE OF THE ELECTRIC OVENShape and blade of the dough mixer• Clean these parts with a sponge or soft cloth dampened in hot water. After cleaning, dry and put back in the oven. Note: The shape and blade of the mixer are fluor coated. To avoid scratches or damage, do not use objects such as metal spoons, knives, etc.
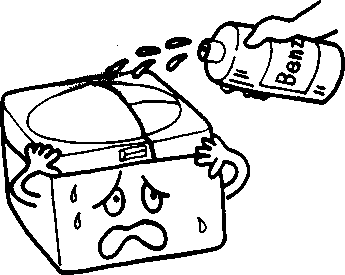
Electric furnace body• Unplug the power cord before cleaning. • Wipe gently with a soft cloth or sponge dipped in hot water. Alternate between wet and dry cleaning. • Never use thinner, benzene or any other chemical agent. Do not use nylon or wire brushes. • Do not use non-kitchen detergents and bleaches.
Dough mixer shaft• Remove all crumbs after each use. Use a sponge or cloth soaked in hot water and then wrung out. • Do not use sharp objects to remove burnt dough. First moisten it with a wet cloth and then clean it. Rubber gasket• If debris collects on the bottom of the main unit of the electric oven, remove the rubber pad and clean thoroughly with a sponge or soft cloth. • Check that the rubber pad is seated correctly on the shaft, otherwise water will leak.
The inner surface of the electric furnaceRemove flour, bread crumbs and other foreign matter with a clean cloth dampened with hot water and a mild dishwashing detergent. Wipe with a clean, damp cloth. Never pour water inside!
SPECIFICATIONS*
'' Subject to change without notice
BREAD WITH ONION # 16 g dry yeast 125 g rye flour, grade 1150 Stir first before 175 g of 405 grade wheat flour} before putting into shape 7 g salt 30 g margarine or butter 200 ml buttermilk, lukewarm Add 45 g of dry toasted onion, chopped 25 minutes after the start, when the signal sounds Baking mode: dark BREAD WITH ONION # 25 g dry yeast 150 g wheat flour, grade 550 Stir first before 150 g of 405 grade wheat flour} themes^ K £ W put in the form 7 g salt 30 g margarine, butter or ghee (lard), soft 190 g buttermilk, lukewarm Add 45 g of dry toasted onion, chopped 25 minutes after the start, when the signal sounds Baking mode: dark WHITE BREAD
200 ml water, lukewarm Baking mode: dark
Stir first before placing in the mold FINNISH BREAD FOR BREAKFAST AND COFFEE5 g dry yeast 300 g wheat flour grade 560 Stir first before 50 sugar} themes^ how to lay in phormu 1 pinch salt 1/2 teaspoon cardamom 1 teaspoon vanilla sugar 50 g butter 180 ml milk, lukewarm Baking mode: medium or light AMERICANSKIM BFIR BREAD4 g dry yeast 300 g of 550 grade wheat flour _ ... Stir first before 5 g salt}. Jr ’How to lay in the form 15 g sugar 15 g margarine 1 teaspoon boiled milk 200 ml lukewarm water Baking mode: dark SPICY breadStir first before placing in the mold
Stir first before placing in the mold
5 g dry yeast 300 g wheat flour 7 g salt (sea salt) 1 teaspoon cumin, ground 1/2 teaspoon coriander 1 pinch peppercorn (pimento) 1 tablespoon honey 230 ml lukewarm fir Baking mode: dark WHEAT BREAD4 g dry yeast 100 g wheat flour 200 r wheat flour grade 1050 5 r salt 1 g a teaspoon of sugar or sugar syrup 60 ml of milk, lukewarm 175 ml of water, lukewarm 25 g of butter Baking mode: medium BREAD WITH RAISINS5 g 300 g 30 g 1 1/2 35 g 200 ml 75 g
dry yeast wheat flour grade 550 Stir first before sugar} those how to lay in shape pinch of salt 2 teaspoon vanilla sugar butter lukewarm milk raisins, add 25 minutes after starting, when the signal sounds Baking mode: medium GRAINED BREADStir first before placing in the mold
5 g dry yeast 150 g coarse rye flour 170 g wheat flour 10 g salt 2 g teaspoons of vinegar 1 teaspoon of lemon juice 280 ml buttermilk, lukewarm 1 teaspoon sugar syrup Baking mode: dark 1. Recipes: * Each recipe lists the standard product doses. The quality of baked goods depends on flour, yeast, etc. You can change the dosage as needed. 2. The maximum weight of products should not exceed 320 g: ’Maintain the total weight of flour and other materials (excluding water) within 320 g. Exceeding this weight can lead to overloading of the motor, inability to mix food and improper operation of the oven. 3. The amount of water should be 60% or more of the total amount of materials: Calculate the ratio of the amount of water to the total weight of the food using the following formula: 60% or more
Amount of water Total amount of food (flour and other materials excluding water) ’Insufficient water can overload the motor, prevent mixing of materials and malfunction of the oven. 4. In summer or when the room temperature is higher than usual: ’Your bread may be too soft. In this case, change the dosage of water or yeast. 5. Beware of using solid foods: ’Avoid using hard foods such as hard candy, brown sugar, frozen butter, and nuts; otherwise, it may lead to improper operation of the oven or damage to the inner surface of the mold. If it is absolutely necessary to use these materials, grind them into small pieces beforehand (less than 1 cubic mm and less than 5 cubic mm for oil, etc.). |
New recipes
