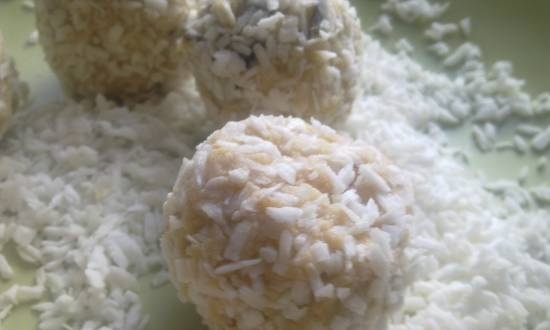
I've been making apple cider vinegar for a long time, I can't even remember when it happened the first time. Somewhere at the dawn of Perestroika. But it started with the purchase of Honey and Other Natural Products by D.S. Jarvis, MD and naturopath, who was a convincing advocate of the product and recommended the widespread use of apple cider vinegar as a traditional medicine. After reading the book, which was then read to the holes by all the acquaintances, there was no limit to joy, as our family always had some prejudice towards the usual "chemical" vinegar or essence. In general, this is not even vinegar, but, as they say, synthesized acetic acid.
And although it seems to me that not all dishes where vinegar is used, such a substitute is suitable, nevertheless, in most cases we choose apple cider vinegar or grape. Its composition is very rich in nutrients, and, most importantly, despite its sour taste, it has an alkalizing effect on the body.
You tell me why bother? Buy apple cider vinegar today is not a problem! But in stores you can only find refined vinegar. It is more useful for us to use unrefined, even if it looks unclear. But it retains all the substances obtained during natural fermentation - fermentation. This process occurs under the influence of acetic acid bacteria that live in the air.
Under their influence, alcohol reacts with oxygen, resulting in the formation of water and acetic acid.
Apple cider vinegar contains 20 essential minerals and trace elements (potassium, sodium, calcium, phosphorus, copper, iron, silicon, fluorine, etc.), a number of organic acids (acetic, propyne, lactic and citric), valuable ballast substances (pectin , potash, etc.), a number of enzymes and amino acids, as well as vitamins A, B1, B2, B6, C, E, P and provitamin beta-carotene. And it is precisely the mutual influence of these substances, due to their unique combination, that becomes a powerful healing factor.
By the way, about the fact that homemade vinegar always turns out to be unclear. If properly defended and filtered, then it becomes completely transparent. In my photo, a three-year bite, clean as a tear, only darkened a little, infused like good cognac.
I make apple cider vinegar every two to three years, ten liters at once, because I have to share it with suffering relatives and friends.
The vinegar must still stand, gain strength.
The recipe contains proportions, so how much apple cider vinegar you can make depends on your desire and the volume of containers available on your farm.
So let's get started.
First step.
- My enamel pots and buckets with soda. I strongly advise against doing it in metal containers in order to avoid oxidation. You can take glass jars with a wide mouth.
- Apples of all available varieties (ripe Antonovka is very welcome, but then sweet varieties of apples must be present) we cleanse of visible dirt. It is still better to wash the carrion, but without fanaticism, just rinse in cold water. We carefully remove the darkened places.If all the apples are dirty and had to be washed, then a few apples just need to be wiped off with a clean paper towel in order to keep the fermentative fungi that are found on the surface and add unwashed.
Apples
with skin and seeds grind in an affordable way. I've done this a few times with a Kenwood high-speed grater, but this year I just chopped them into wedges and chopped them with a spinning knife attachment. I liked this method more than grinding on a grater - it is easier to filter later, not much pectin is released.
-
We take clean water - checked well or spring water, filtered or boiled. Boiled should be held for a day to saturate it with oxygen.
Dissolve honey or sugar in the required amount of water. If the honey is thick, then it should be slightly warmed up in a water bath. But do not overdo it with heating so as not to kill the nutrients. If the honey doesn’t dissolve, it will settle to the bottom of the pot.
(You can do it with pure sugar, but it is still better to add at least some amount of honey available to you, at least in the second phase.)
At the first stage, we take 0.5 liters of water and 50 g of honey or sugar for 400 g of apple mass.
Subsequently, we will add more honey or sugar.
- Put the crushed apples in a saucepan and add water with sugar or honey.
We do not fill up to the very top !! Leave for fermentation about 1/5 of the volume.Mix everything well with a wooden spoon, put a couple of pieces of rye on top, better, of course, homemade bread (you can use a spoonful of rye sourdough).
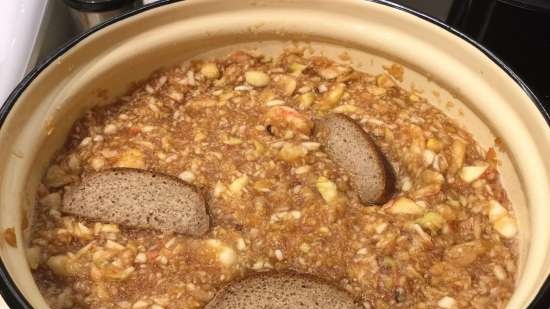
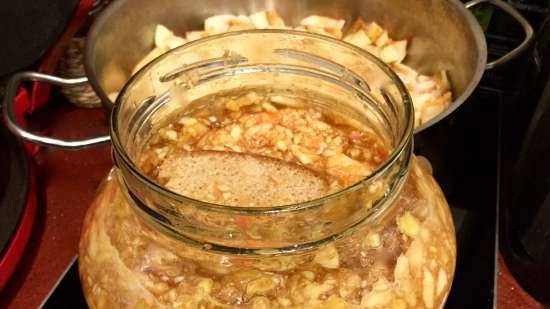
- Then we close our container
four layers of gauze and knot very carefully. If this is not done, then flies will appear, penetrate inside and spoil your work. My flies appeared only once, a long time ago, when the technology was violated. I am now tightening the gauze on the cans with silicone ties for baking, and on the pan I fix it tightly with a bandage, tying it to a bow.
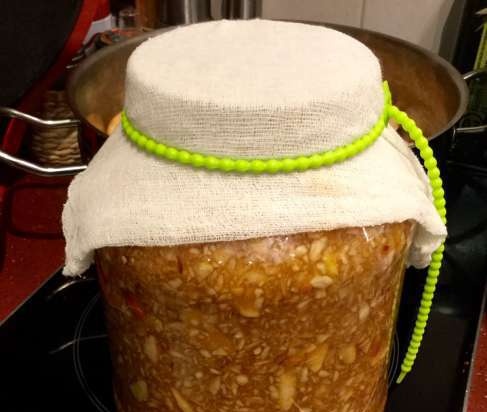
- We put our future vinegar in a warm place (28-30 g), somewhere on the floor against the wall,
so that there is no direct sunlight. After a couple of days, the apple mass will ferment and rise to the surface. It will need to be mixed.
- Once every two to three days, even better more often, stir the vinegar with a wooden or plastic spoon. Let stand for about five minutes without gauze and again carefully cover with gauze. Try not to stain the gauze in the vinegar so that flies don't fly. The bread can be removed on the third day, as the fermentation process has already started.
This is how the pulp rises to the surface. We need to mix the wort well.

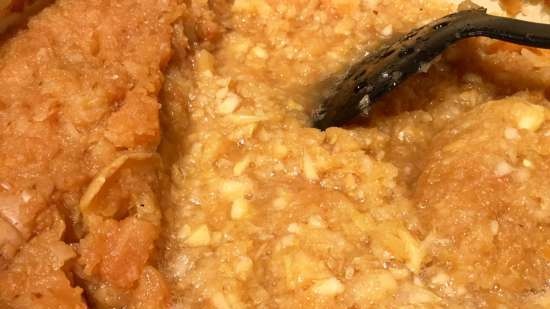
- We are waiting for 12-14 days, fermentation should subside a little.
Second phase- After 12-14 days, filter the wort first through a fine colander to remove the pulp, and then through cheesecloth folded in three layers. Separately squeeze the pulp through cheesecloth to get as much vinegar as possible. But it is better to do this through clean nylon tights, folded in several layers.
- Again add honey or sugar in an amount of 50-100 g per liter of the resulting cloudy apple mash, stir well and drain for the final quiet fermentation and standing in clean three-liter jars. The amount of sugar or honey depends on how sour your apples are.
We again tie the jars well with gauze in four layers. We need to provide oxygen for normal vinegar fermentation to occur. So, if there are cans with a wide, non-standard neck, it is better to use them. In this way, the fermented apple juice will gradually begin to turn into vinegar.

- We put the banks in a warm, dark place (they stand in my room behind the furniture and the door) and forget about them for two months (50-60 days). They do not bother anyone, only slightly saturate the atmosphere in the room with a light sour aroma, already very different from the smell of ordinary mash. Do not expose cans to light!
- First, fermentation is activated, after all, we added honey-sugar, so signs of fermentation will appear again, but then gradually fermentation will come to naught, and the bubbles will practically disappear from the surface.There is no need to bother the vinegar and all the time to look into the jars, all the more to stir and fiddle with them. Let everything take its course.
By the end of the term, after 40-60 days (sometimes earlier), the liquid will become almost transparent with a small amount of sediment at the bottom. This means the vinegar is ready!
The taste is dominated by acid, the smell is acetic. Still rather weak sour taste.
- Now we need to drain well, and then strain the resulting apple cider vinegar.
We put the container on the table and, using a small diameter tube (I have 0.5 cm), pour the entire transparent layer of vinegar into a separate container. It is advisable to do this in one go, so choose a larger container.
We drain to the sediment level. Then we filter the precipitate separately.This is how it is done. One pan is on the table, the second, where we will pour, is on the floor. We lower the tube into a saucepan with liquid, slightly draw air from the tube and, as soon as we see that liquid has run down the tube, we quickly lower it into a saucepan that is on the floor. We make sure that the tube does not reach the level with the sediment and does not stir it up.
Gradually lower the tube to select as much clear vinegar as possible.
As soon as we almost get close to the layer with sediment, we immediately interrupt the process.
The sediment can be filtered several times through cheesecloth, through paper filters, you get good vinegar.
The gauze must be washed and boiled in advance, since it was bleached in an industrial way.There is another excellent proven method of straining - use clean nylon tights. There are also special bags for weighing curd.Do not be discouraged if a little turbidity gets in, it will settle, and you can strain or drain the clean layer again.
In the course of long storage, the sediment will still turn into small flakes, and it is not difficult to clear vinegar from them.
It is better, of course, to repeat the settling process twice to get perfectly clear vinegar at the end. And then pour into bottles.
The second grade with a slight sediment will still settle, and during use it can be drained from the bottle to the level of the sediment. And in some dishes, use it as it is (in stewed cabbage, for example).
- Next, pure, almost transparent, pour the vinegar into glass bottles not to the top and
well we seal. Don't roll up! Store in a cool, dark place.
We start trying in six months. During this time, it matures, brightens, gains acidity. It can and should be opened and tasted during the ripening process.
The full and most useful vinegar becomes closer to the year.
- At some stage of storage, the so-called
vinegar uterus.This is a very good sign - the vinegar turned out to be correct and very useful. There is no need to throw away the vinegar uterus, it is a valuable product. It can be used to make other types of vinegar from berries and fruits.
Acetic uterus (lat. Mycoderma aceti) is a jelly-like, slightly transparent mass, similar to swollen gelatin or kombucha. Sometimes it is very thin and delicate, and it can be dense and plump, like a jellyfish. Often it lives at the neck of the bottle, like a cork, or it can hang out at the bottom of the container (which means it is already lifeless).
Since I prepare grape vinegar according to about the same recipe (only with a small amount of sugar) from purchased grapes that have to be washed, I use vinegar uterus.
I hope that this year she will please my vinegar with her presence.
Well, now, four weeks have passed, the vinegar uterus has settled in all the banks.
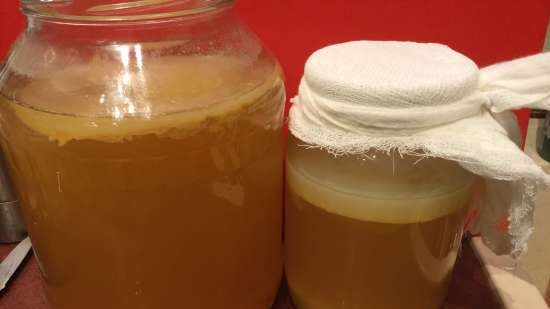
The vinegar uterus is a valuable product. It can be used to speed up the preparation of a new batch of vinegar. Producers of natural vinegar cherish it like the apple of their eye.
The vinegar uterus must be removed from the container with vinegar, otherwise it will absorb all the vinegar and grow a lot.
If you want to preserve the vinegar uterus, then carefully remove it from the container with your hands and transfer it to a smaller jar, then fill it with a little vinegar.
If the uterus is plump, then it can be divided, well, how we divide the kombucha. To save it for the next season, I think that you need to separate it several times, otherwise you will spend a lot of vinegar.
If the uterus has sunk to the bottom, then you just need to throw it away, it is already inanimate.
If we add vinegar uterus to sweet tea and then act as with ordinary kombucha, that is, constantly feed it with tea with sugar, then we will simply transfer it to kombucha. I think that the kombucha obtained in this way is still healthier than the usual one grown on tea with sugar.
It is believed that the vinegar uterus is several times higher than the healing properties of the vinegar itself.
From it they make ointment for the joints, with its help they treat burns.
If you want to enhance the properties of ready-made apple cider vinegar, then you can just as carefully place the uterus in it, and after 3-5 days use the "reinforced" composition according to the previous scheme. This is believed to increase the healing effect.


